2014
While I was just randomly browsing the web I saw an article about 'the best flightsimulator' and clicked on it. Naturally I ended up downloading the X-Plane 10 demo, and right after that I warez'd the full version. Combining them and updating it I had the latest version of XP with full scenery and it ran forever (the demo runs only for 15 minutes or so). The same day I ordered Saitek's yoke+throttles and rudder pedals. And at this point I want to say that after a year or so I also bought X-Plane so no warez any more, but I still run my original warez based version because I don't want to set up everything again :-)
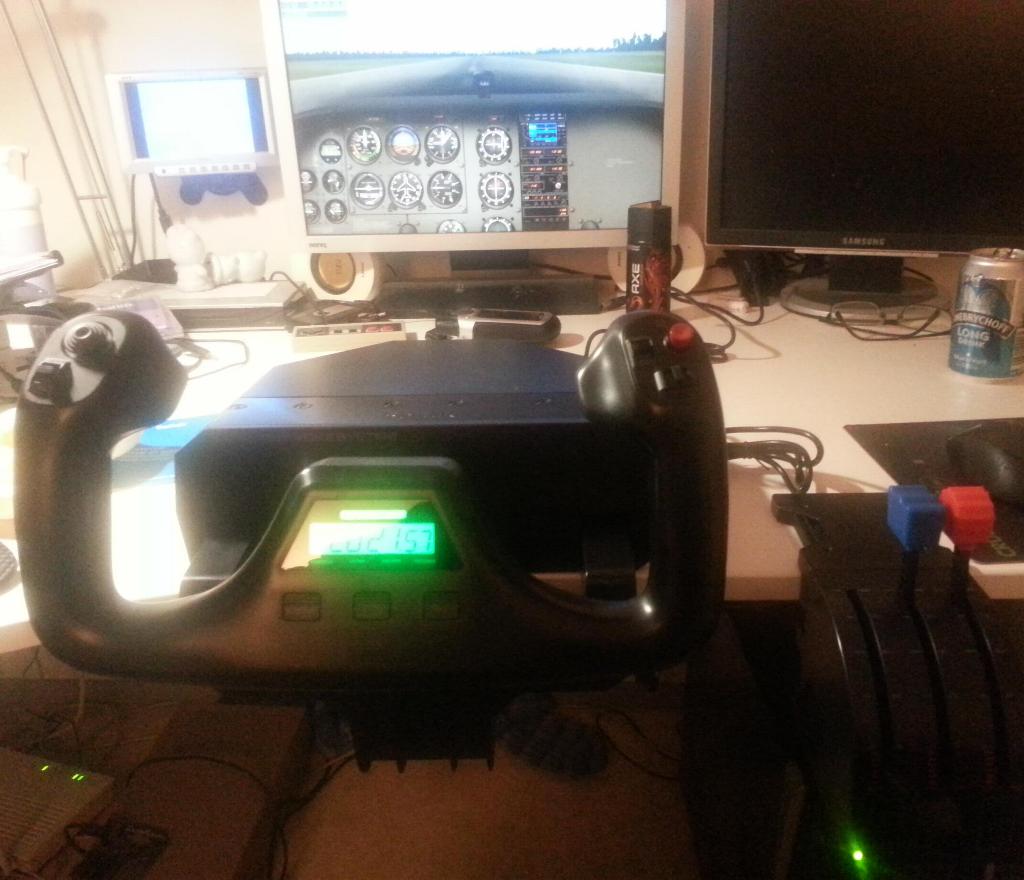
The Saitek yoke has a well known problem with having a 'blind spot' in the middle for left/right movement (don't remember if it was also up/down), the accuracy in the center is very low so it makes slight adjustments difficult for example in landings. The mechanics and potentiometers are ok, the problem is in the firmware of the yoke and can not be fixed. I learned that people have used a Leo Bodnar BU0836X board to fic it. It can be described as electronics of a joystick.
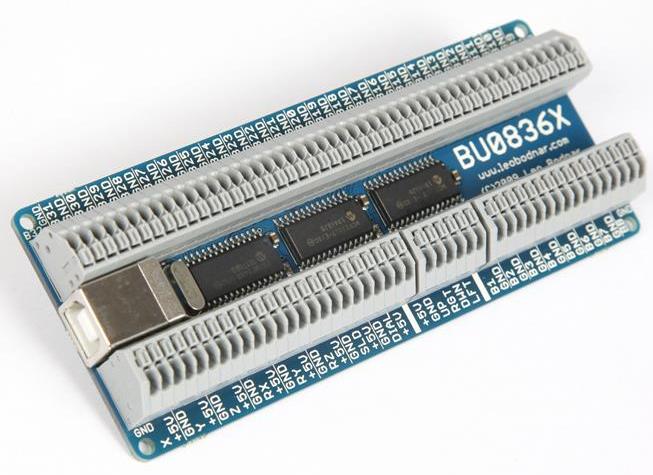
When you connect it to a computer, the computer sees it as a joystick with 32 buttons, 8 axis and a POW hat. You can connect 'any kind' of buttons, encoders and potentiometers to it and then you just bind them to desired functions on your game. So the fix for Saitek yoke is to connect the potentiometers to BU0836X and after that you have no blind spots or poor accuracy in your yoke. Like we all know, a plane has quite a lot of switches and buttons that need to be used......

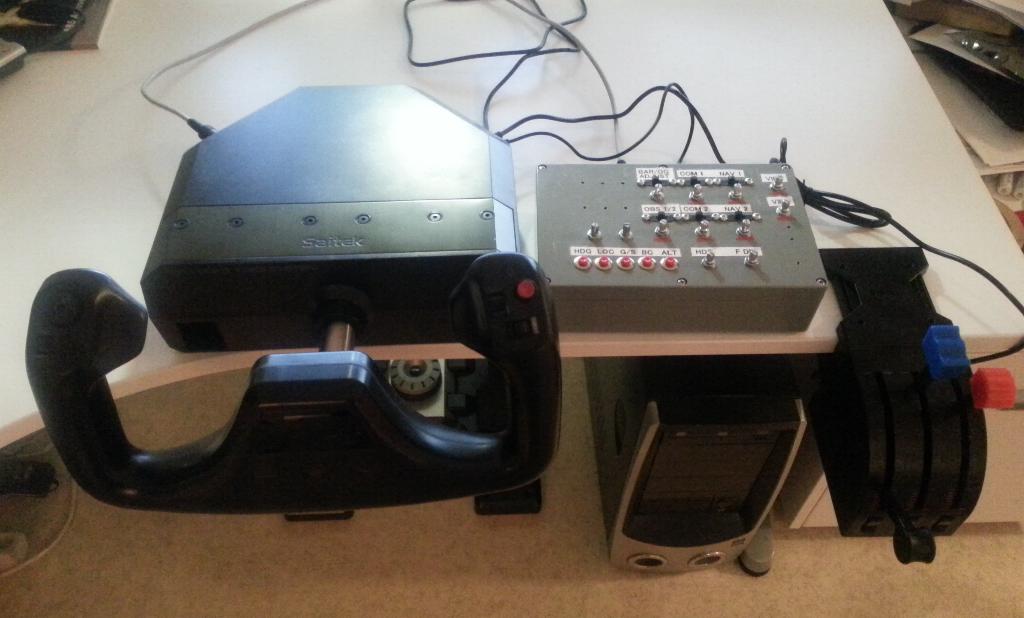
.....and as the BU board has the capabilities for much more than just left/right and up/down, why not use it for something else too. As I have no room for a fully blown home cockpit, I ended up with my Pilotbox -'project'.
The first thing naturally was connecting the Saitek yoke, and it started with modifying the internal electronics.
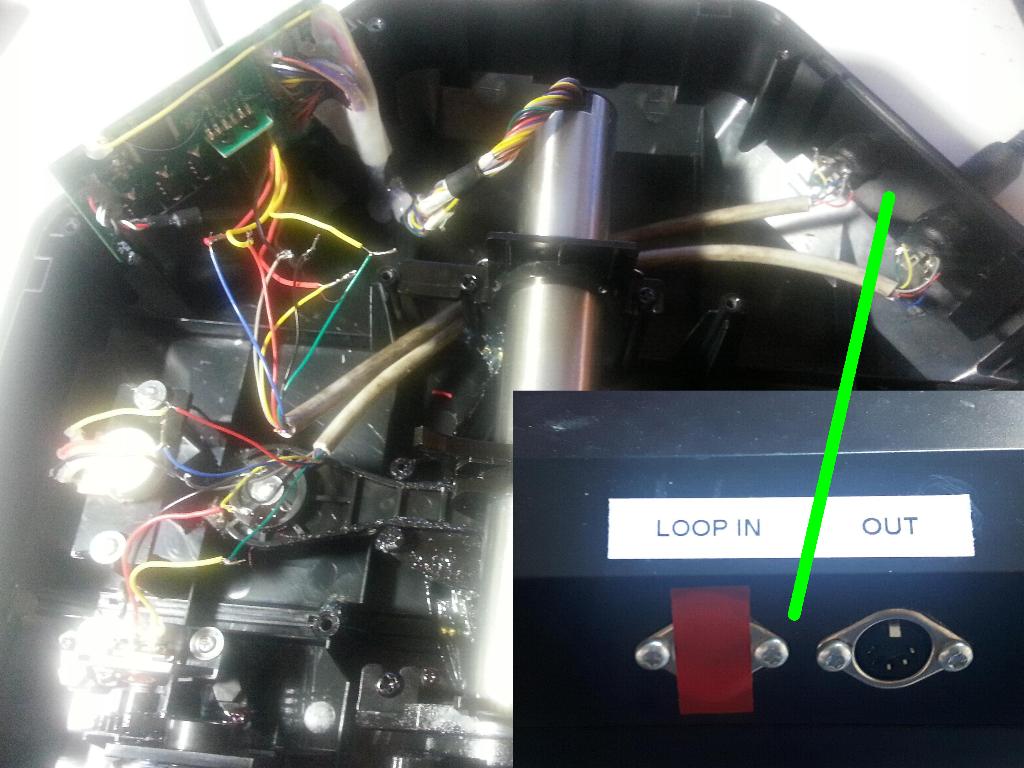
The pontentiometer wires were cut and joined to a connector on the back. The other connecter in the back is wired to the original electronics, so if needed, this can still be used without the BU board just by looping the external cable back to the other connector. It sure would look better with some more modern connectors, but that was all I had avalable at that point and 'I was in a hurry' anyway.
And in no time it was up and running. No blind spots in the middle any more, and from now on I couldn't blame the yoke for my poor landings.
While waiting for all the stuff to come from China, made something with what leftovers I had.
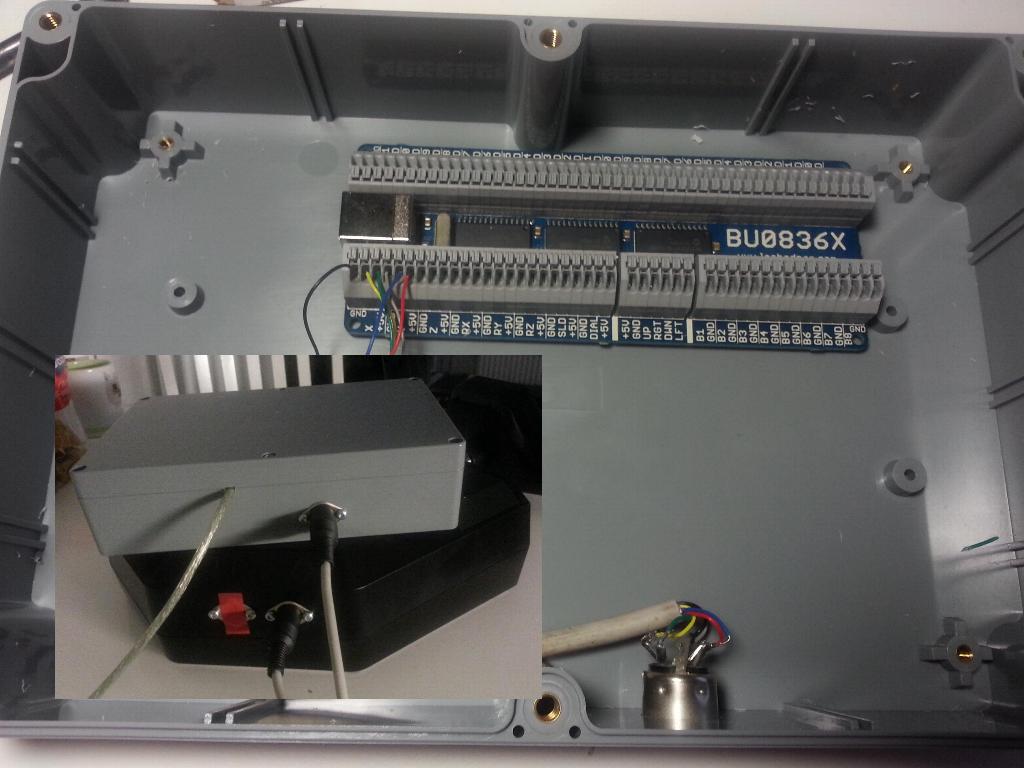
And after all the the stuff came.
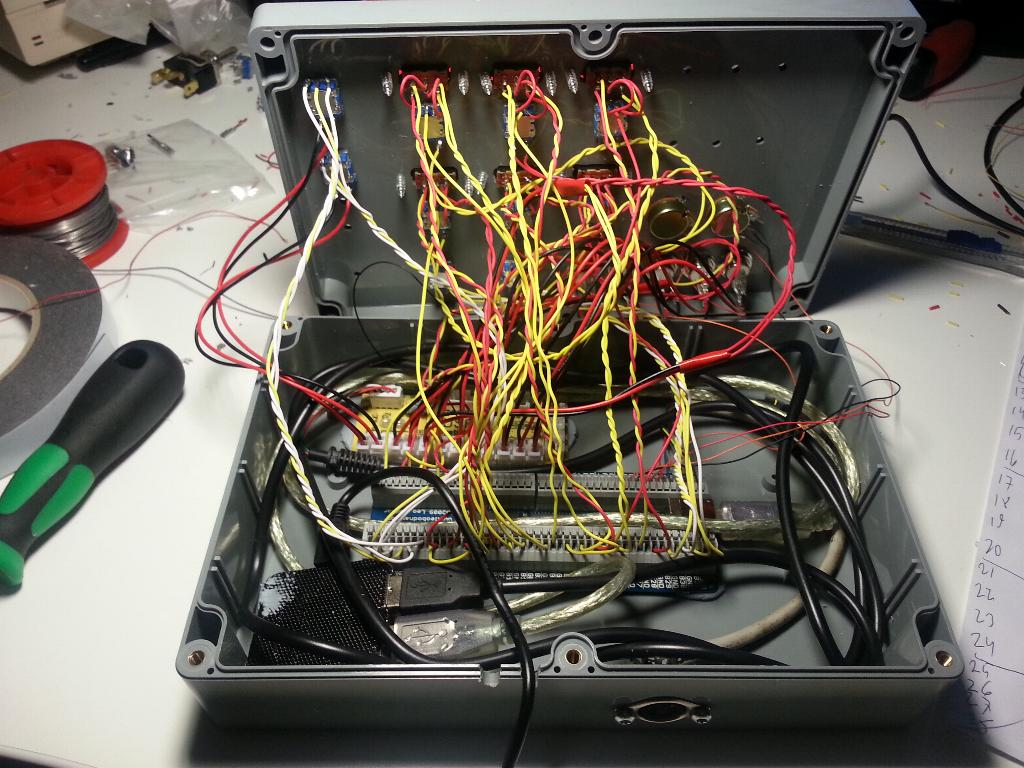
At that point it was clear just one BU0386X wouldn't be enough for everything so that's why there is a USB hub and a cheap joystick controller too (the price is maybe 10-15% of the BU, more about these below).
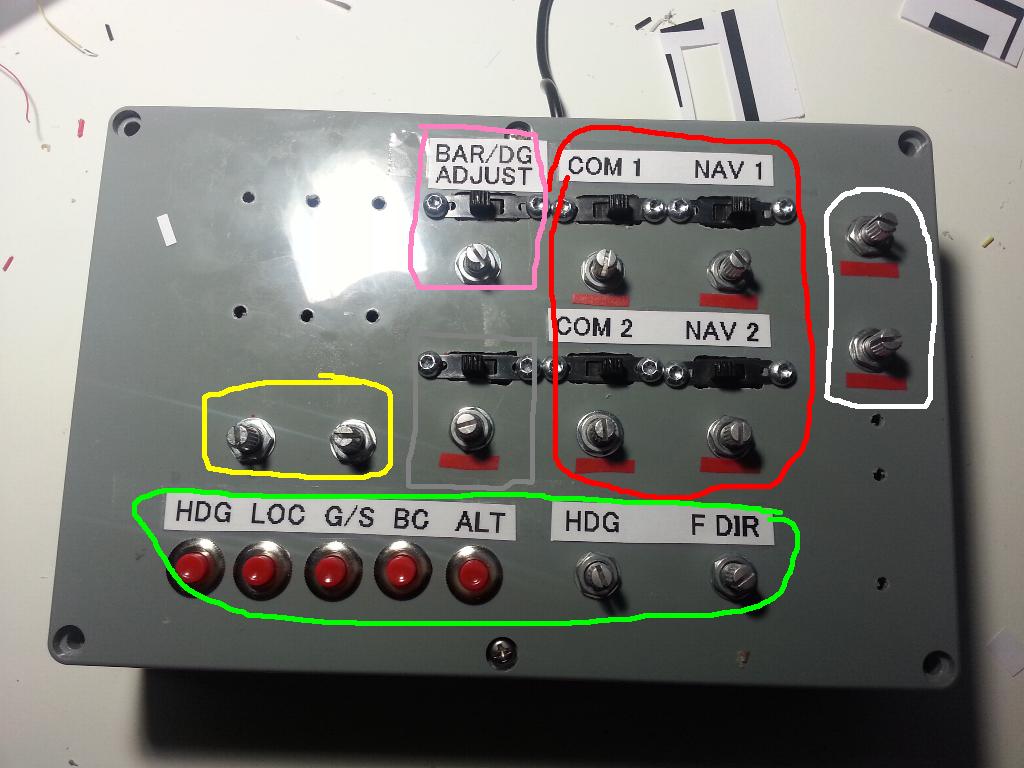
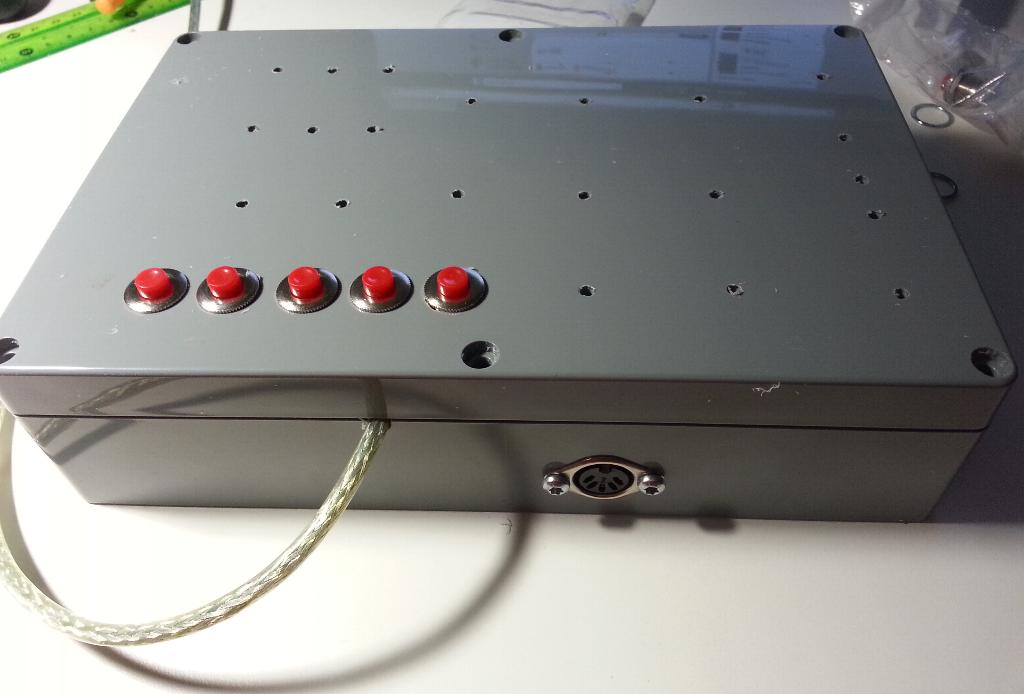
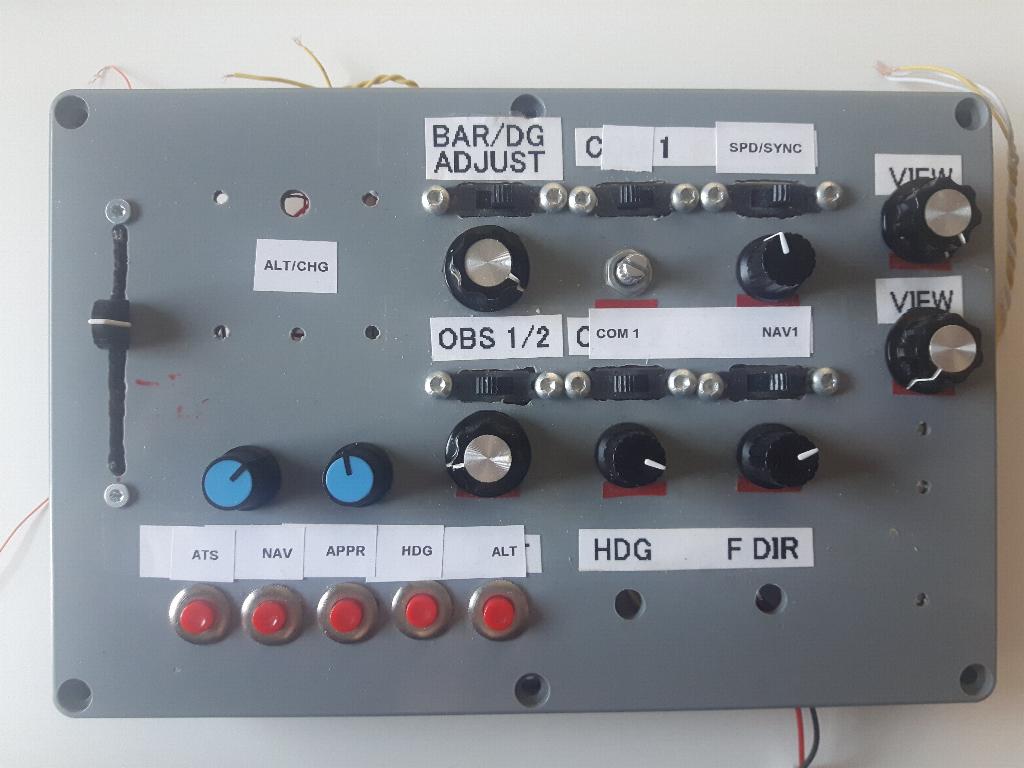
It was originally made for the stock Cessna 172 which I think would be a real life starter level plane. The red area was for COM1/2 and NAV1/2 frequencies, and pushing the know turned audio on/off. The knobs are encoder switches, meaning they click constantly when you turn them and the computer thinks every click is short push of a button. Naturally turning left and right are configured as different buttons. The slide switches above every encoder is a budget solution. As you can see in most of the planes, frequency knobs have two knobs in one shaft. Like this:
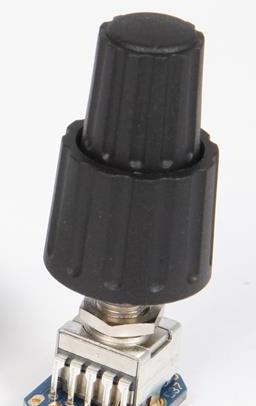
The larger knob adjusts 'coarse' and the smaller 'fine'. The thing is, those cost _money_. At the moment you can find 10 rotary encoders in Ebay for less than 4 EUR incl P&P, and the cheapest duals with knobs I have found are around 12 EUR + P&P. The duals above are from Leo Bodnar are almost 30 EUR with knobs, though they seem to be quite a bit easier ton install/solder as the cheaper.
So, the robust slide switches above the encoders are for selecting 'the other' function, coarse/fine in the case of frequencies. Connections needed for this parts was 20
The upper in the white area was for turning view left/right, and pushing it would return to main 3D cockpit view from any view. The lower was used for looking up/down. Wasn't very usefull but that's what is usually was. Pushing the lower brought up the GPS pop-up ans pushing it again made it go away. Both were encoders, total of 6 connections were used.
Green section for autopilot. HDG and F DIR were encoder switches. 9 connections needed for these.
Ping was for what it's labelled, gray was for OBS1/2 and it had the selector switch to select which one was to be adjustet. Pushing the gray button switched full sceen on/off. 9 connections needed for these.
Like said earlier, the BU board can handle 32 buttons, and counting the listed connections above we end up with figure 44. And that's why I you saw the cheap 12 connections china board in the picture.
The two in the yellow section are potentiometers, not much use in a Cessna but I had the hardware so why not.
It was made quick, and I admit looks like it too. But the idea was to see if it could be done and would it be usefull. And usefull it was. Using the radios, VOR navigation and the autopilot was quite a bit simpler than hovering around with the mouse or trying to remember all the keyboard bindings and hitting the right key.
Eventually all the knobs for the encoders came and I used it succesfully for 3 years for my on-off flighsimming. When I changed the Cessna for a Mooney, I added a slider to operate the gear and over the time I have used it for stuff like testing dual rotaries and so on, but mainly it is like it was and it has done a good job. For a while now I've been gathering stuff to make a new and bigger version of it, and when I bought the Eclipse 550NG the other day, I decided it's time to scrap this and start a new one.
Before we move on to the next version, a few words about those cheap joystick boards compared to the much more expensive Leo Bodnar stuff. (This is not an ad, there are propably other as good boards but LB is what I'm familiar with and their customer support is flawless)
In ebay you can find these (usb joystick controller board, sort by price):
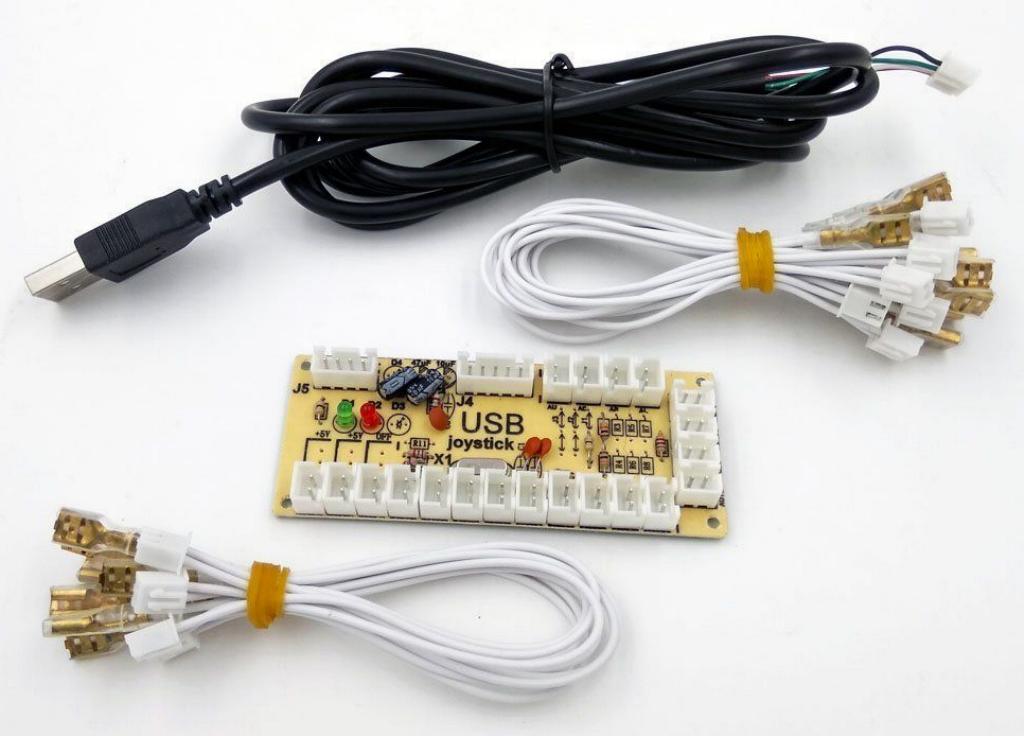
These can be used just like the expensive stuff to make a button box and they cost less than 10 EUR. So why not these?
1) You can not use encoders with these. Even if the encoders are seen as buttons on the computer, they require more sophisticated electronics.
2) You can not use potentiometers with these. So for example the 'Saitek mod' I made can't be done.
3) You can not use many of these at the same time. One would think you could get 3x12 buttons for 20 EUR but these seem to have the same 'serial number', so your computer
doesn't know where the signal is coming. I have 3 of these, bought separately years apart, slightly different PCBs and even they don't mix. Accoring to LB's site, you can have as many of their
gadgets as you need.
BUT! If you are sure you aren't going to need more than 12 buttons ever, these do their job. I have one too!
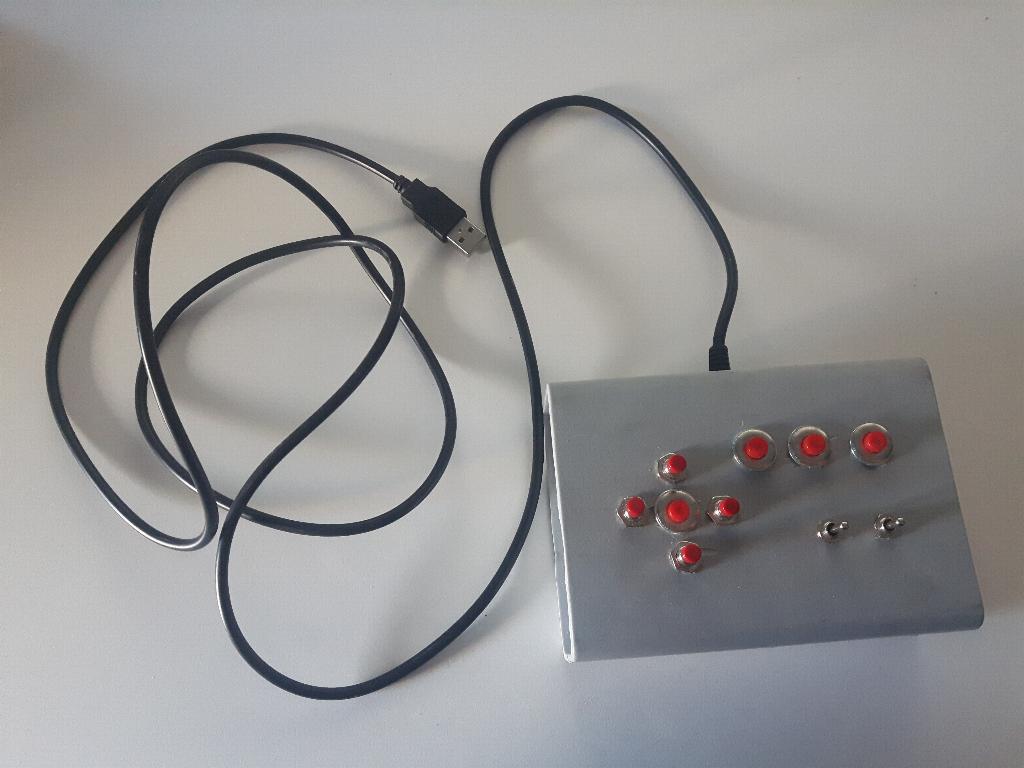
I made it for my other computer I use for running another instance of X-Plane. With those buttons I can esily select views and the map if I need to. Something like this would most likely to be the ultimate 'DIY for everyone' whatevergame -controller, maybe gun down a lamp in Airfix Dogfighter or select a new weapon for Duke Nukem.
Now you can continue to the 'Pilotbox 2'
or
Go back to the Main page