The plan
The first version was made the stock Cessna 172 in mind, but in the next version I will try to add functions needed in more complex planes. A few weeks ago I bought the Aerobask Eclipse 550 NG and that's what I'll be using as reference. I'll try to add some new features for small GA use too, most likely they will be my primary planes in the future too.
This time I'm trying to make it look less like an old Russian spyingdevice, and I'm also going to try to route all the wires so that it can be modifed - and serviced, if needed - easier. This time there is going to be more functions so I'll be going with Leo Bodnar's boards, one 12 button board from China isn't going to add a lot and you can't use more than one of those at a time. I will use the BU0386X board from the previous, and I also got me a BBI-32 wich is a board with 32 connections for buttons and encoders. Unfortunately the old BU0386X died (didn't work with any of my computers) and spending another 60-70 EUR isn't an option at this time. I emailed LB describing the problem and asking if there is something I could try, and they had the best possible answer; 'Send it to us and we'll fix it or replace it'. Now that's what I call customer service. Currently it's on it's way there.
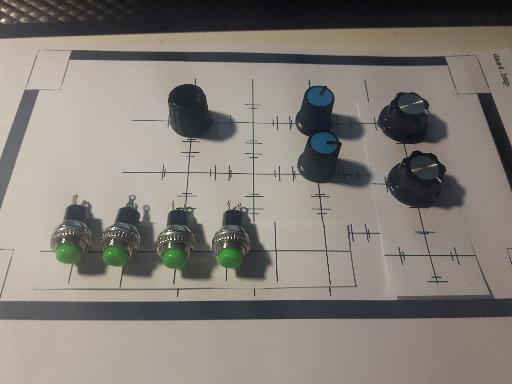
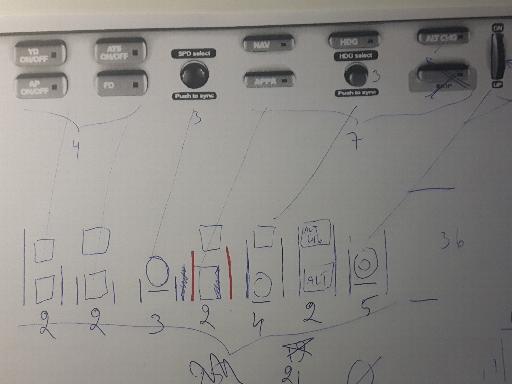
At the moment the idea for the new box is something like this:
NAV 1/2 & COM 1/2 frequencies with dual encoders. Pushbutton function switches active/stdby.
Buttons to monitor the above on/off
Eclipse autopilot panel (slightly modified to save space), same buttons can be used for AP+GPS in GA use.
Two 50mm slide potentiometers for throttle (three if there is space, for 3 engines or something else)
30mm slide potentiometer for landing gear, maybe a few for something if there is space.
On the other side there will be a 50mm round knob for using the elevator trim.
Two encoders will be positioned to be used for aileron and rudder trim, though don't know if I ever need them but surely they can be used for something else.
For viewcontrol I will be having 1 or 2 encoders, pushbutton function will return to the default view like before. I will also be adding a few buttons to activate
different views, these I didn't have in the first version but with the Eclipse's glass cockpit they will be handy.
One momentary flip switch will be used for raising and lovering the flaps. If there is space and connections left I'll put 1 or 2 more for future needs.
Controlling the Skyview in the Eclipse would also be nice, but it would take up to 14 connections in my device and I don't believe I have that many left. Also the Skyview has 8 softkeys in a row, don't know how easy it would be trying to hit the right button. Though I do have an idea...
If I can make it fit, I will also put a small 'usb sound card' in it, and then I'll have 3.5mm connectors in the box to use a headset for radio communications (all the other sounds will be still coming from the speakers).
Things that don't happen
unohetut
tattihattu
läpät potikalla
potikka trimmille
autopilotin nuppi
Get to work
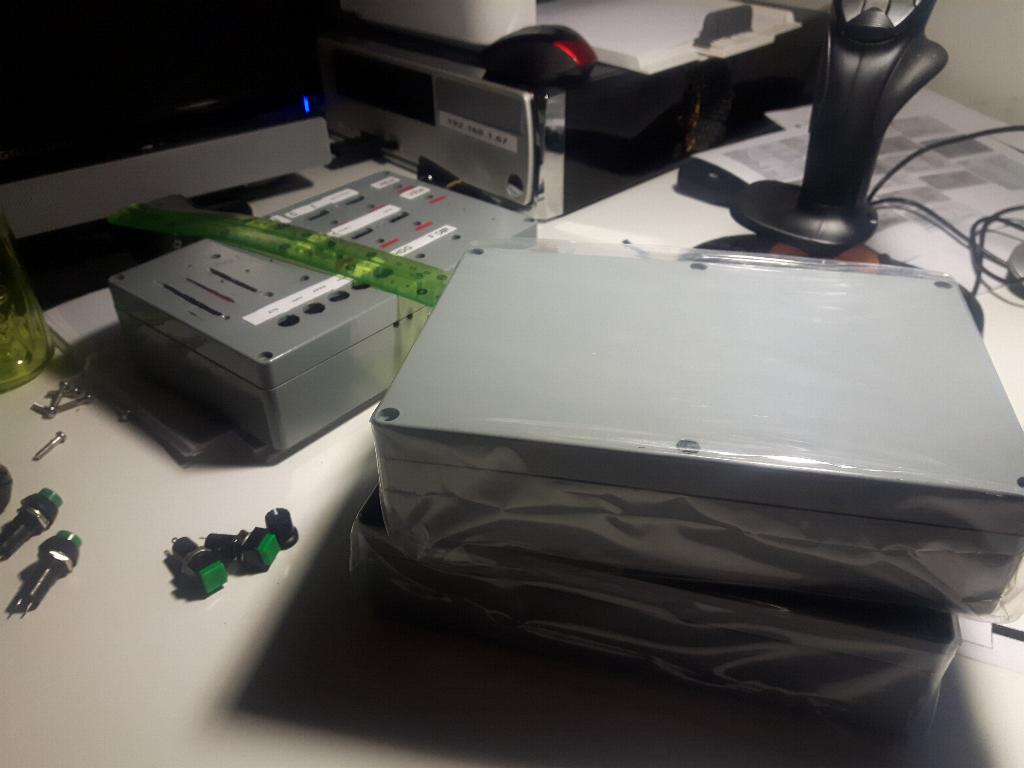
The box I used the last time was 22x14.5 in size and 5.5cm height, and it was clearly professional stuff. Cost quite a bit but the material (plastic, ofcourse) was very good and responded well to drilling and grinding. Also the top fits the bottom perfectly. This time I wanted something bigger, or two of the same. Now my local dealer is out of business and I'm a bit in trouble. All I'm able to find is something ridiculously priced (would take 80-100 EUR) but good stuff, and then there is ebayjunk for pennies. The largest I could find in ~5cm height was 12x20cm so I ordered two of these. While waiting, I found out that I had two of them already but with 7.5cm height and that's too much.

The boxes came, and they are as 'good' as the higher boxes I had already. The plastic feels so hard that it will propably crack when it gets even close to a drill or a Dremel. I still decided to go with these, and started designing the layout.


While doing that I came to conclusion I need to find boxes like the old one, these new and cheap just aren't enough. I need the extra space and like I said before, the material doesn't feel like it's very easy to work with. Again I browsed here and there and Finally.
When I got the plans done for the upper part (and some for the lower) it was time to get the tools out.

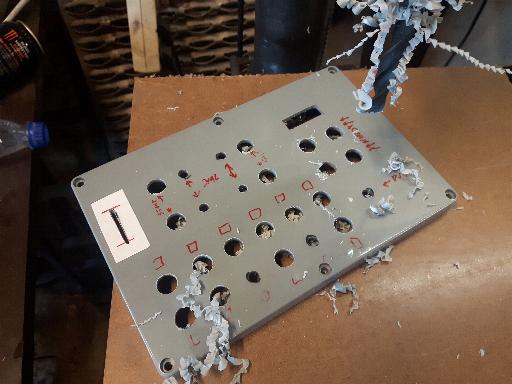
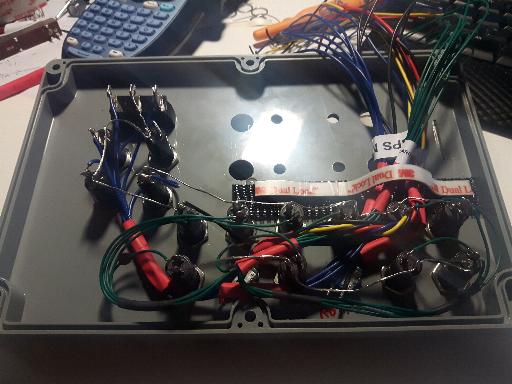

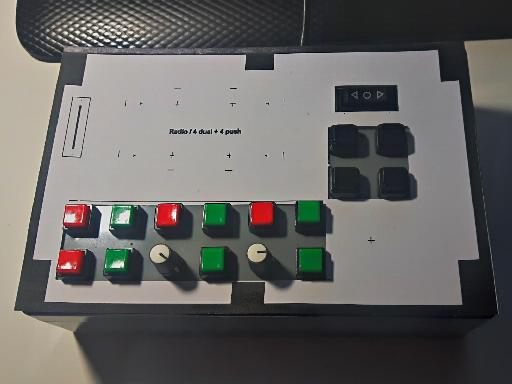

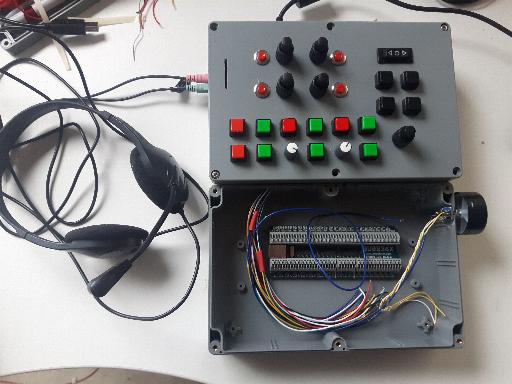
Eventhough the picture with all the wires and stuff looks quite a bit of a mess, it is more or less easy to replace components or do modifications. Especially compared to the first version in which I had almost zero serviceability. Constructing it made me realize that I have the black buttons a bit too close to the other ones, but that it just because I wanted to leave a bit space on the right side for future additions. There is no problem of using the buttons but now it seems I have a bit thight space for labelling the buttons.
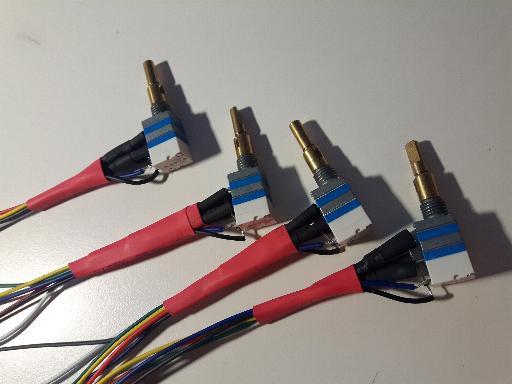
The next thing I need to do is wire 5 dual encoders, and that will be a full day of tiny sodlering so it will take a while.

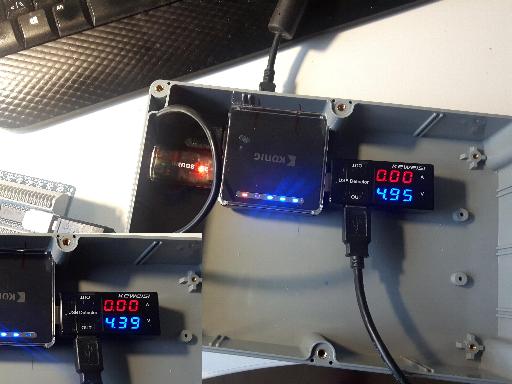
Today I tested how the voltage is without a powered USB hub. It does have a conntion for power, but I prefer one cord less so tested without. And once again, there is quite a bit of difference with a good and not so good usb cord. With the not-so-goot the BU0386X didn't work at all without external power, but changing the cord fixed that. Now there's also a USB 'soundcard' for for example TeamSpeak mic/headphones.
Go back to the Main page